CARAMELIZED ONION AND MUSHROOM PASTRIES


SAVORY PASTRIES that your friends will fight over.
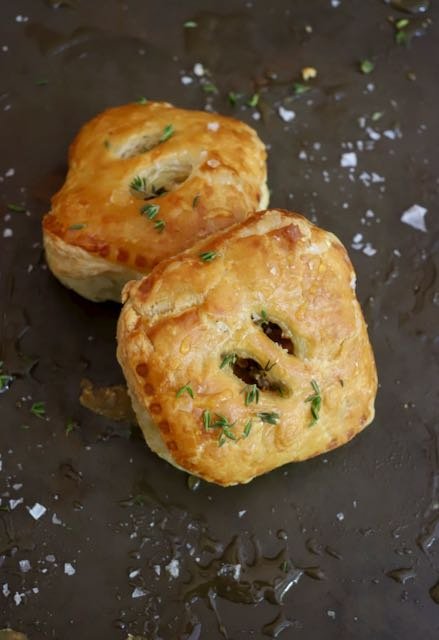
This small batch of pastries was a hit in my home. I saved two for my hair colorist, who I absolutely love, and the other four got devoured by my family who walked into my apartment and immediately thought these were store-bought. They are impressive flavor wise too. The complexity of the caramelized onion flavor paired with the mushrooms is heavenly. FYI. if you want your pastries to be a touch sweeter, you can always add honey to your filling mixture.
Other Pop-Tart Styled Pastries I Love

CARAMELIZED ONION AND MUSHROOM PASTRIES
Yield: 6
Prep time: 20 MinCook time: 50 MinTotal time: 1 H & 10 M
Ingredients
KITCHEN TOOLS
Instructions
TO MAKE YOUR CARAMELIZED ONIONS
- In your frying pan, over high heat, melt your butter together with your olive oil.
- When the oil is shimmering, add your chopped onions. Use your rubber spatula to move them around on and off for the next 5 minutes. You are looking for them to be softened and slightly yellowed.
- Season them with salt and pour your honey over them.
- Let your onions cook for 15 minutes, stirring every few minutes. You want them to begin to brown and stick slightly to your pan.
- Add 1 tablespoon of your thyme. Mix.
- Remove from heat. Set aside. DO NOT CLEAN YOUR PAN.
TO MAKE YOUR FILLING
- In the same frying pan that you cooked your onions in, heat a tablespoon of olive oil.
- When shimmering, add in your mushrooms. Cook them down until they are soft—about 5 minutes.
- In your mixing bowl, mix together your caramelized onions, mushrooms, 1/2 a tablespoon of thyme, and your goat cheese.
- Season with salt and pepper to your taste.
- OPTIONAL. If you want sweeter pastries, add honey to your taste.
TO MAKE YOUR PASTRIES
- Pre-heat your oven to 400º.
- Lightly dust your work surface with flour.
- Lay your first sheet of thawed puff pastry dough down on your flour. Roll it out just slightly until the seams are even with the rest of your dough.
- Use your sandwich cutter or knife to cut 2"x2" squares. You should get 6 from each puff pastry dough sheet.
- Fill the center of 3 of your pastry squares with your filling leaving a 1/4 inch bare around the edges.
- Use your pastry brush to brush your egg wash along the edges of the pastry that you left bare.
- Use your hands to slightly stretch the remaining 3 squares of dough you want to use for closing the top of your pastry. Then, lay one over each of your squares with the filling. Gently press down on the edges to make sure it fits well. Use your sandwich sealer to press down on the edges and seal them. If you don't have the sandwich cutter and sealer, use the backside of the tines on a fork to press down repeatedly around the edges of your pastry to seal it.
- Use a pairing knife to cut two slits in the center of your pastry. This will keep your filling from causing too much pressure during the bake and causing your pastries to explode.
- Transfer your pastries to your baking sheet.
- Brush your egg wash over any visible piece of dough.
- Bake until your dough is a golden brown color—20-25 minutes.
- Let cool. They will deflate a little as they cool.