CHOCOLATE GINGERBREAD GELT

CAUSE JEWS CAN EAT GINGERBREAD TOO!
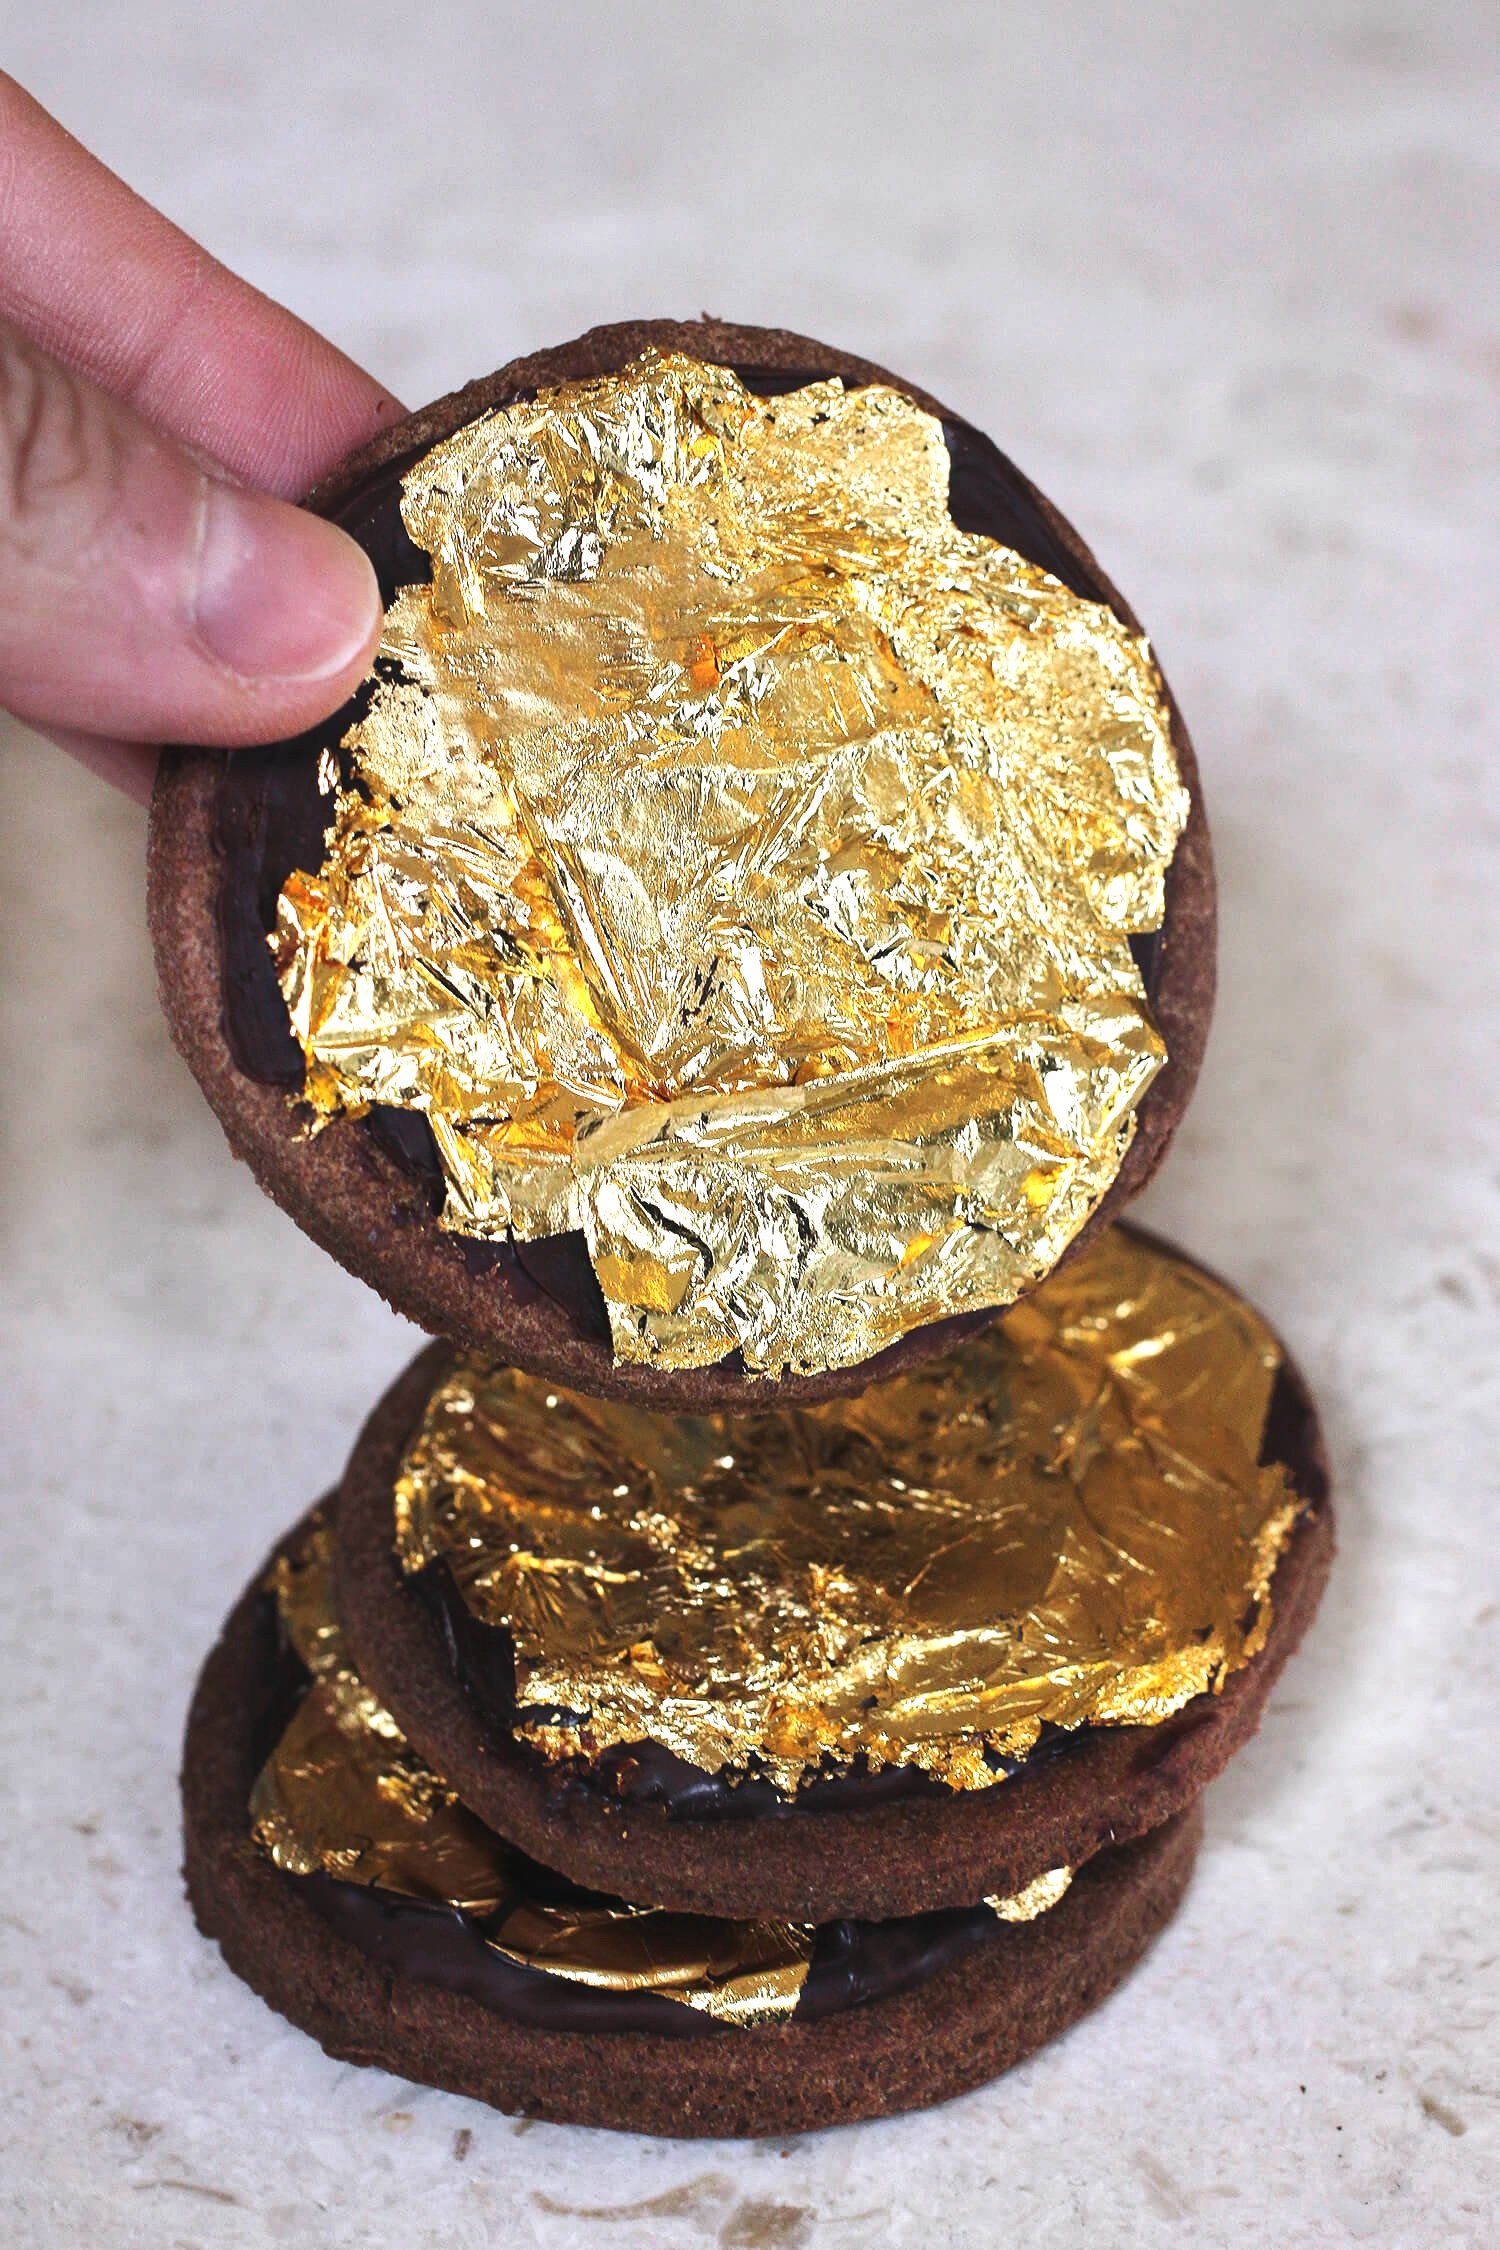
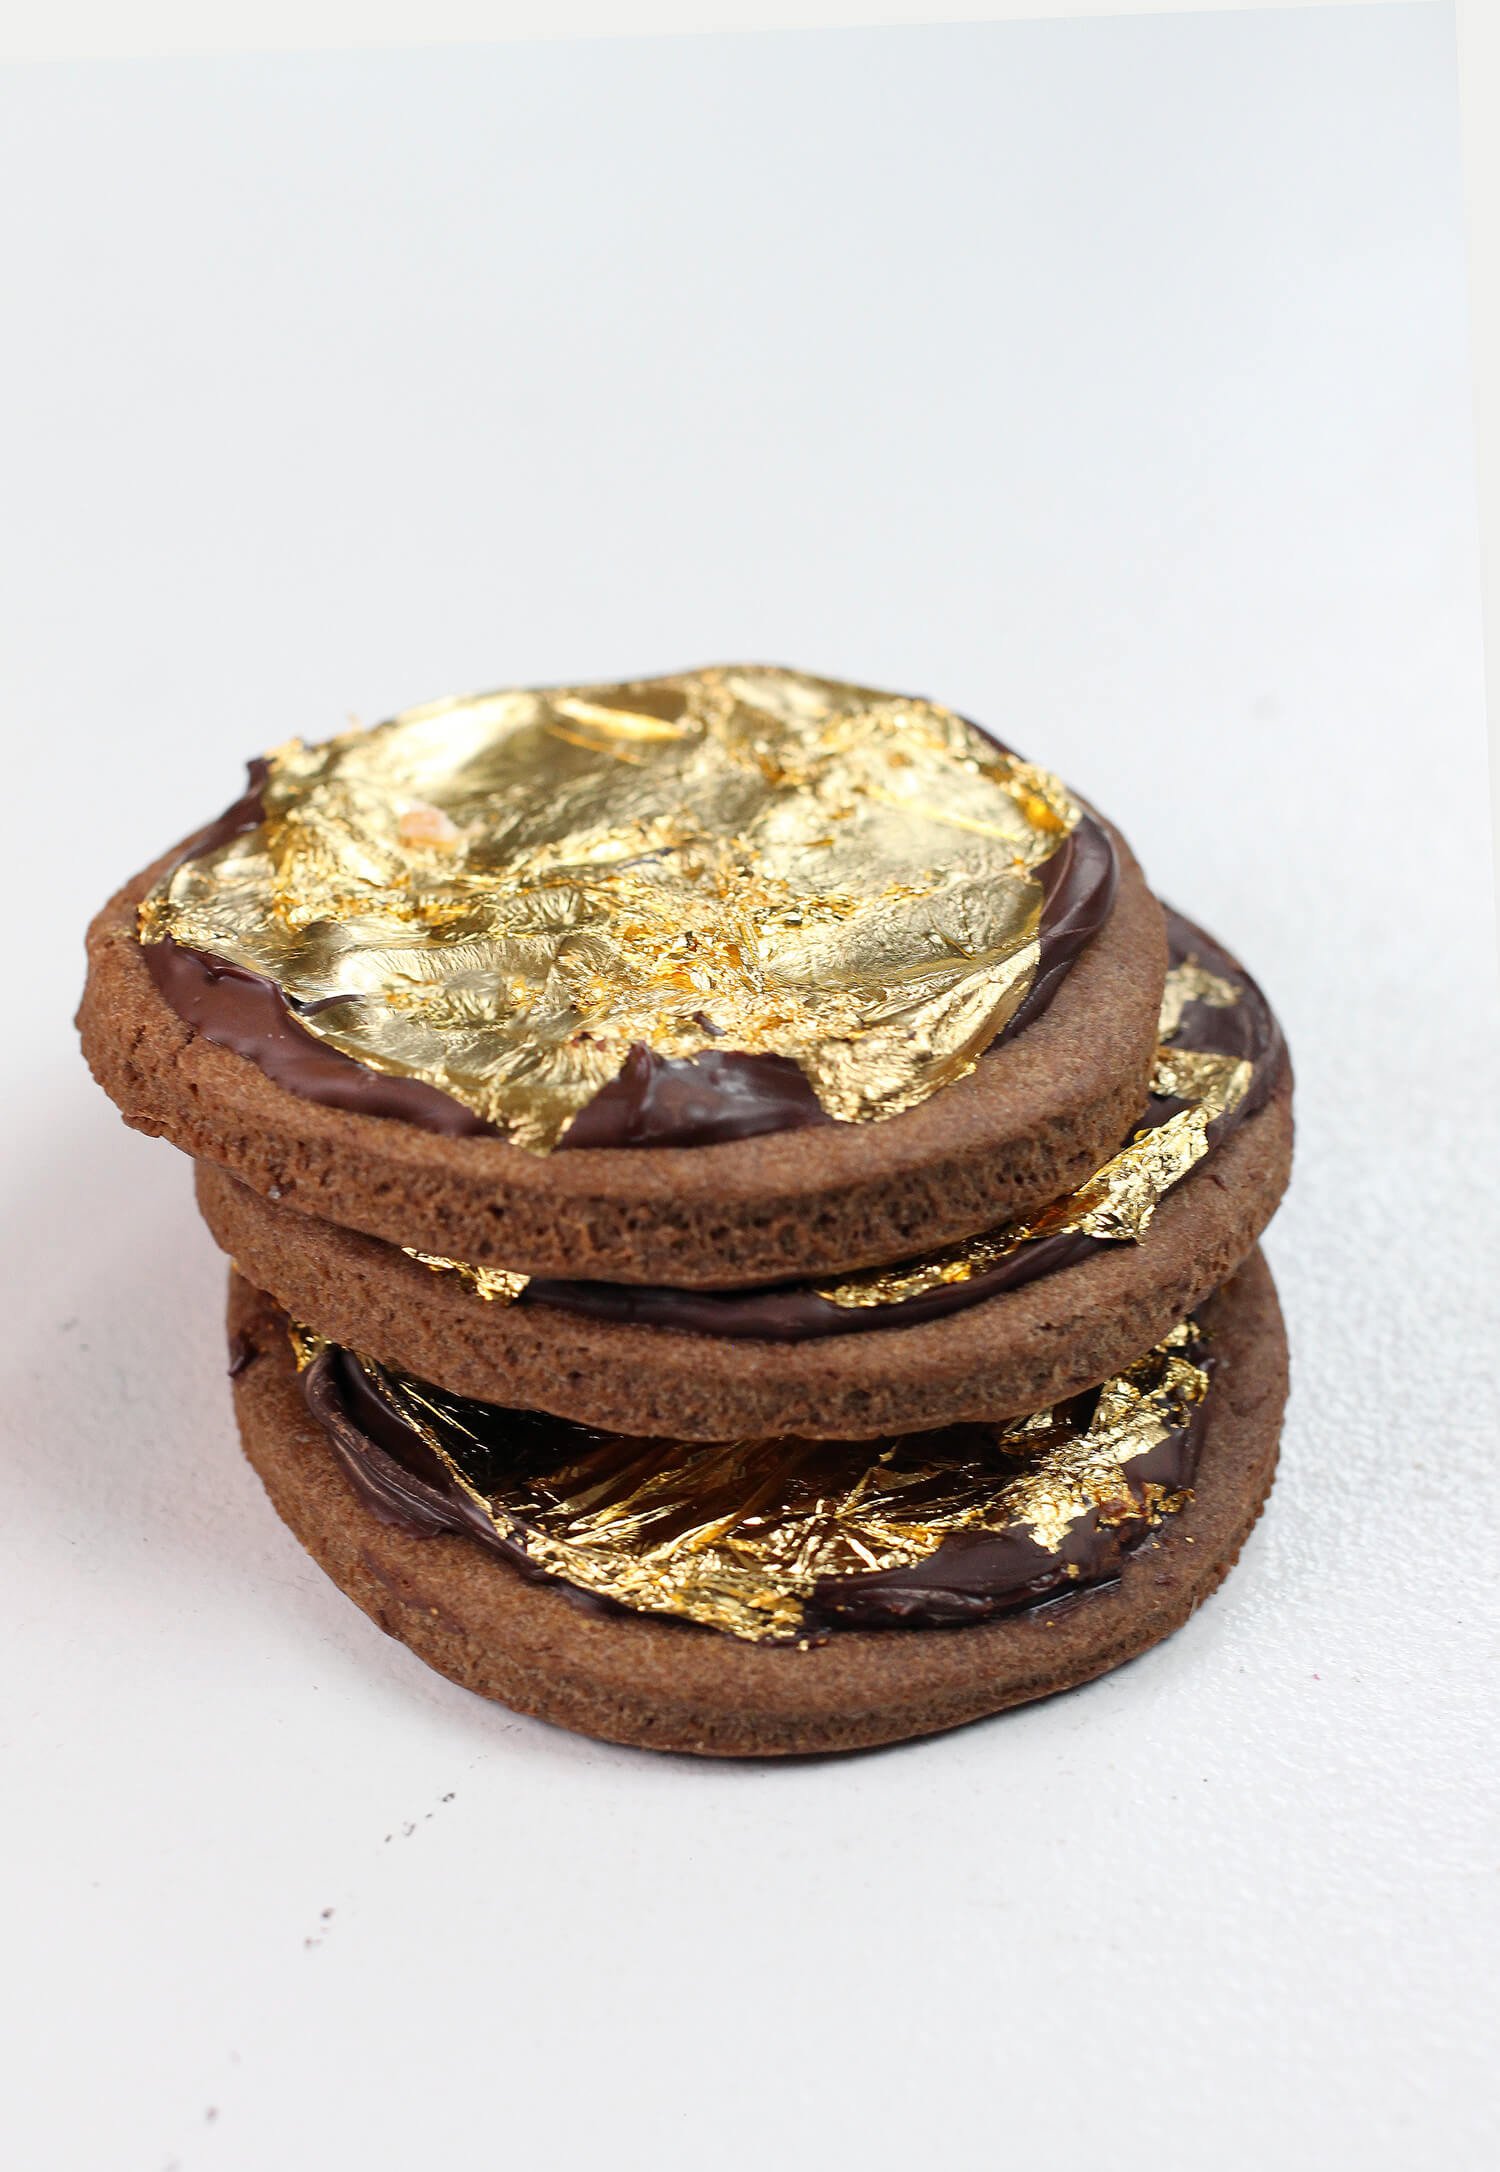
If I’m being honest, I’ve always been a bit disappointed by gelt—it’s meh chocolate wrapped in gold foil that’s stamped to look like a coin. Sure, I’ve seen upscale chocolatiers make it with exceptional chocolate but that’s as far as I’ve seen. My disappointment led to an idea, this idea—AND I LOVE IT! It’s fancy gelt and it’s awesome! The bottom layer is chocolate gingerbread, that’s then topped with semi-sweet chocolate, and finished off with gold leaf. Again, I love it!

CHOCOLATE GINGERBREAD GELT
Yield: 9 Gelt
Prep time: 15 MinCook time: 10 MinInactive time: 10 MinTotal time: 35 Min
Ingredients
FOR THE CHOCOLATE GINGERBREAD
FOR THE TOPPING
KITCHEN ITEMS
Instructions
TO MAKE YOUR CHOCOLATE GINGERBREAD
- Preheat your oven to 375º.
- In your mixing bowl, whisk together flour, cocoa, cornstarch, ginger, cinnamon, nutmeg, and cloves.
- In your stand mixer, on a low speed, cream together your butter and dark brown sugar.
- Once fully incorporated, add in your molasses, vanilla, and egg and continue to mix. It doesn’t look very pretty and even at this point. Don’t worry, your still nailing it!
- Slowly spoon your cocoa flour mixture into your wet mixture in your stand mixer while it’s still on a low speed.
- Once evenly incorporated, your dough is ready. Use your hands to roll it into a large ball and then flatten it into a large disk.
- Lay a long piece of parchment paper down on your counter. Place your dough on top of it. Like a sandwich, cover dough with a second long piece of parchment paper.
- Roll dough until it is and even 1/8” thick all over.
- Use your round cookie cutter to cut out 9 circles starting from A CORNER of your dough.
- Line your cookie sheet with your silpat.
- Place your gingerbread dough rounds on your silpat lined cookie sheet.
- Bake for 10 minutes.
- Let cool to room temperature.
TO TRANSFORM YOUR GINGERBREAD COOKIES INTO GELT
- Put your chocolate chips in the corner of your Ziploc bag. Microwave them in 15 second intervals, massaging the chocolate in the bag during each break, until it is fully melted—about 1 minute.
- Cut a tiny piece off of the corner of the bag your chocolate is in. This is bag will become your piping bag. The hole is where you will squeeze your chocolate out of.
- Squeeze your chocolate into a circle slightly in from the edge of your cookie. Partially fill the center of it with chocolate and then use your mini spatula to spread it evenly around until the top of your cookie is fully covered. Don’t pause here, you’ll want to adhere your gold leaf while your chocolate is still wet.
- Very carefully—and I’m not even joking when I say don’t breath too hard—hold the paper that your gold leaf comes on and gently flip it over onto your chocolate. FYI. You can cut the gold leaf while it’s still sandwiched between the paper. This helps when you want to fill smaller holes. The gold leaf will crumble or rip if you touch it, I used a pair of cooking tweezers to push it to my liking around the edges but I don’t recommend using them in the middle of the chocolate or you will likely see tears.
- Let sit until your chocolate is fully hardened—a couple of minutes.
- And you’re done! Happy Hanukkah!