
APPLE CIDER CAKE aka the taste of Autumn.
Apple cider cake in the fall is almost too perfect. Warm cinnamon, nutmeg, and cloves bring out the natural sweetness of apples, while concentrated apple cider gives each layer a rich, unmistakably autumnal flavor. This Apple Cider Spice Birthday Cake pairs three layers of tender, moist cake with smooth vanilla buttercream for a dessert that feels both celebratory and beautifully seasonal.
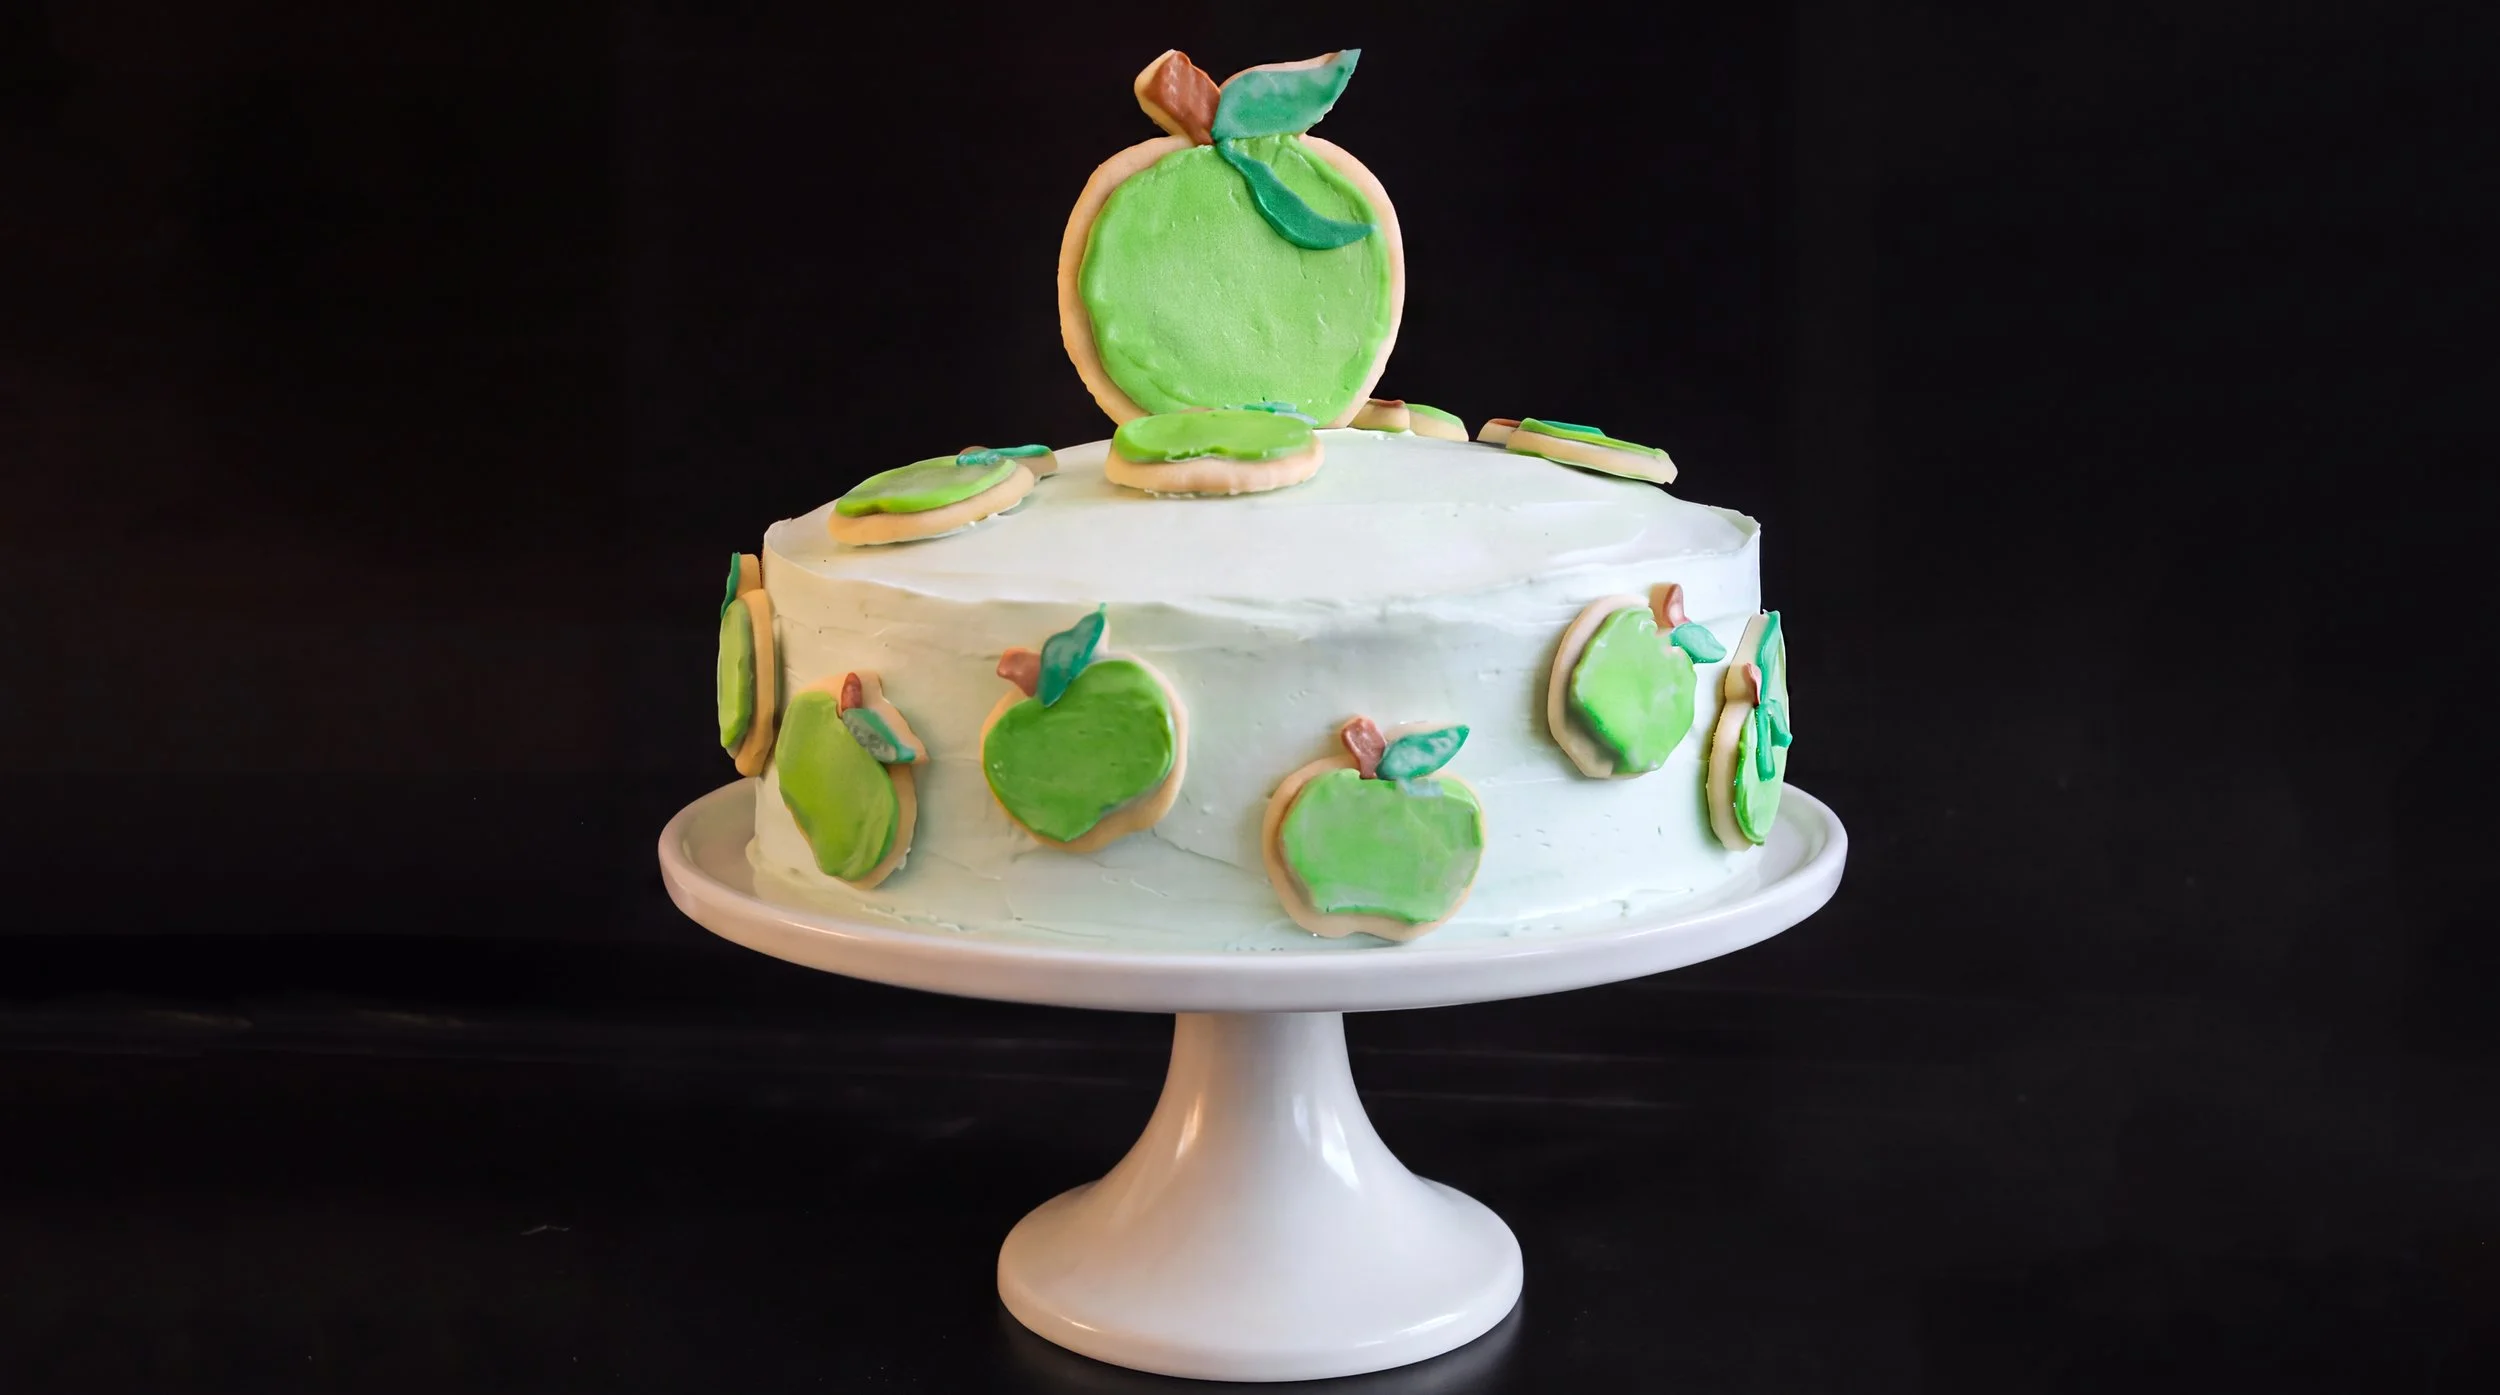
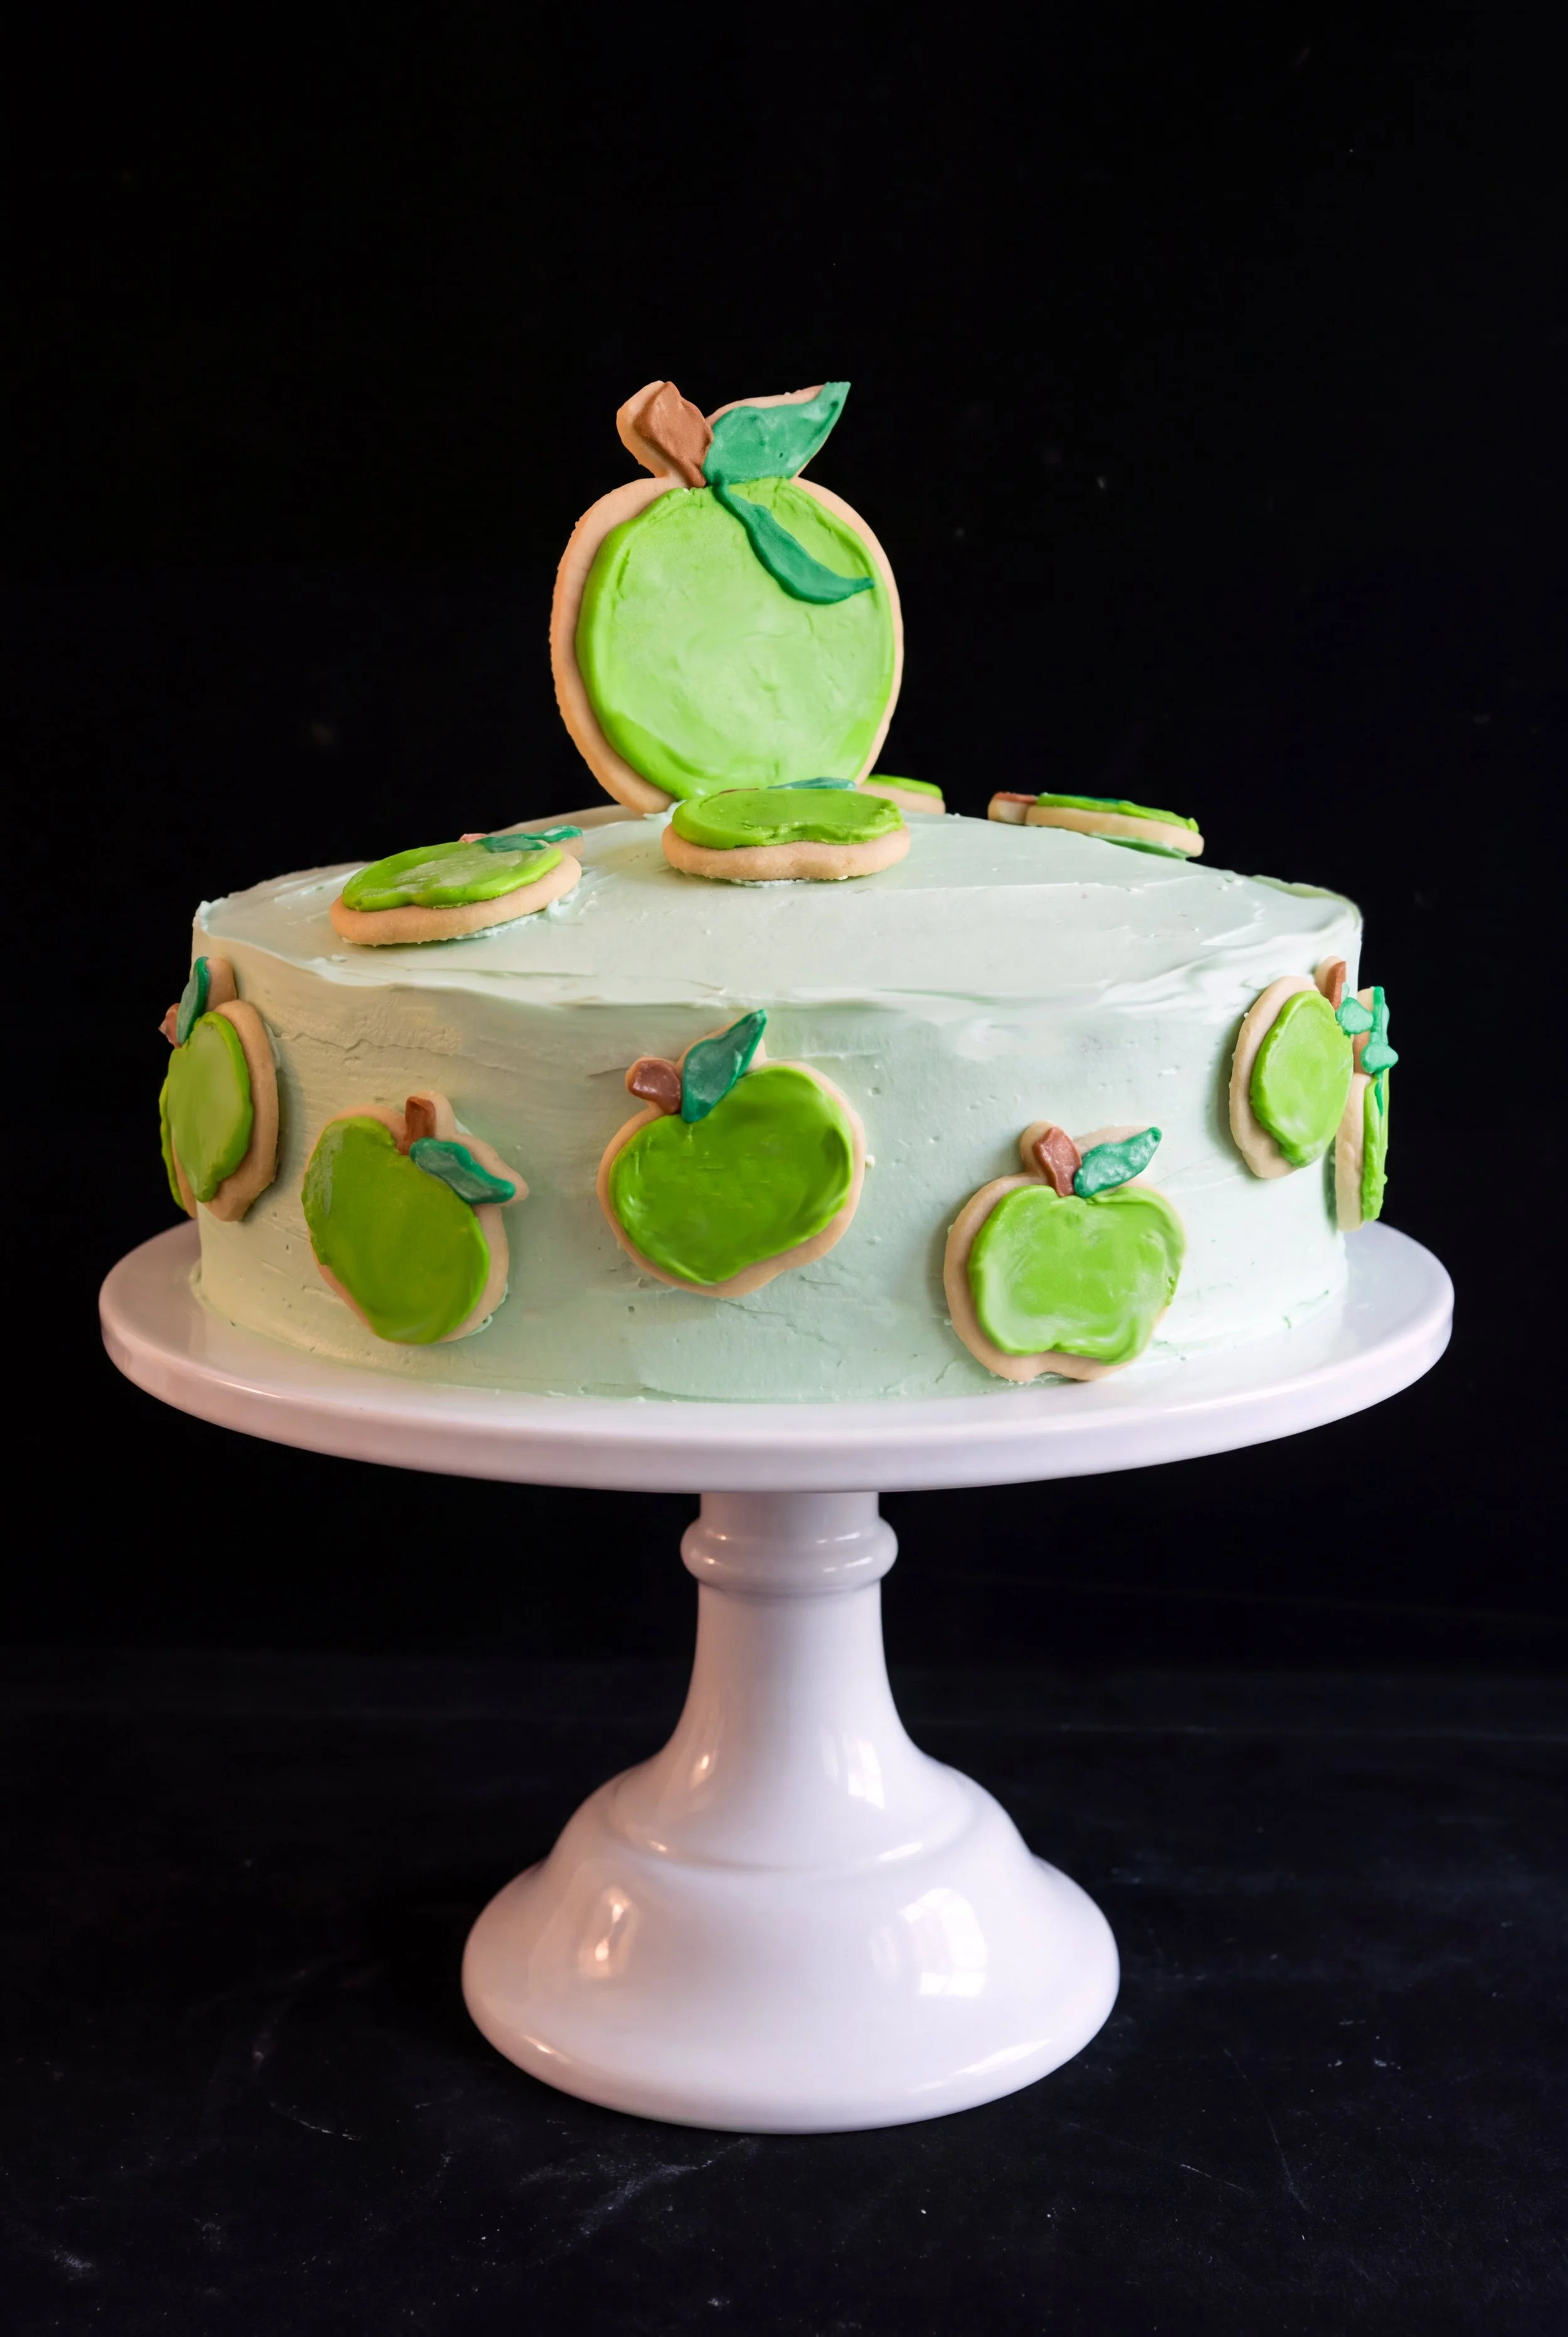
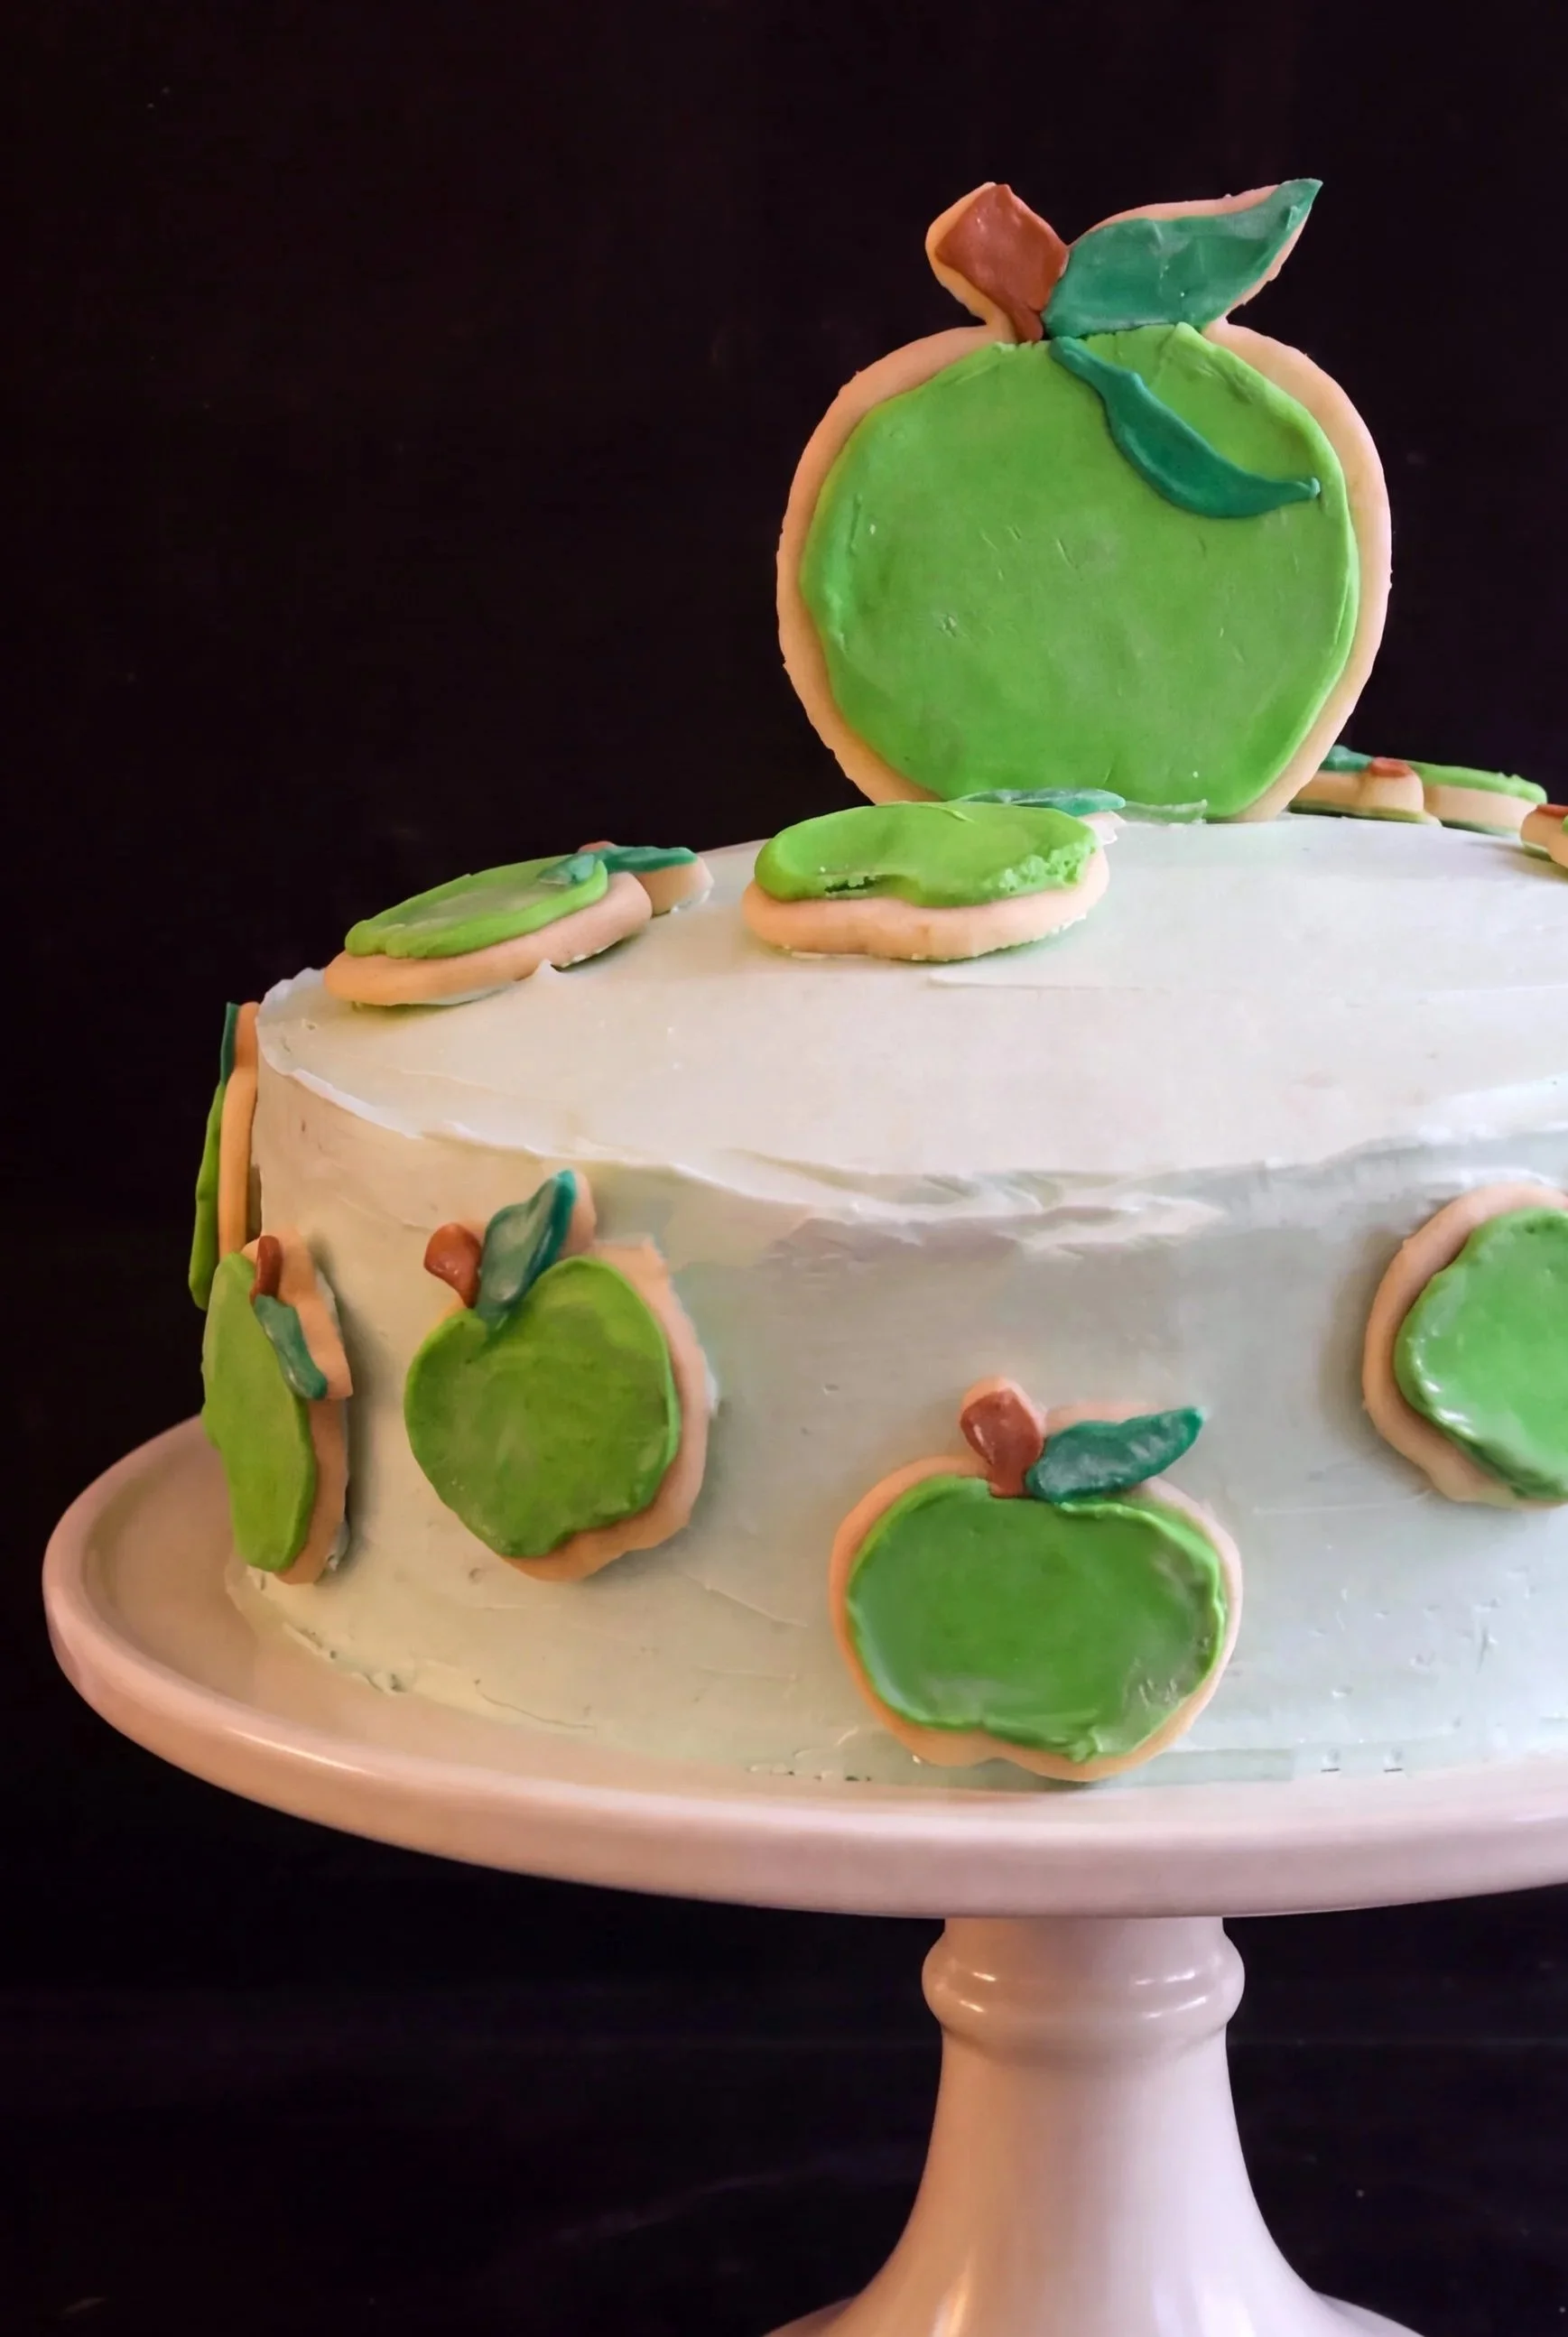
Aesthetically, the pale sage-green buttercream provides an elegant contrast to the miniature apple-shaped sugar cookies wrapping around the exterior. Each cookie is baked until just set, then finished with bright green royal icing, complete with tiny stems and leaves. The cookies bring an additional buttery sweetness and a delicate crunch to every slice. The kids absolutely loved the cookies; they added a level of unexpected fun.
Although this cake has several components, each can be prepared in advance, making the final assembly surprisingly manageable. Whether made for a fall birthday, a classroom celebration, or a festive gathering, it is an autumn-inspired centerpiece that looks as lovely as it tastes.

APPLE CIDER SPICE BIRTHDAY CAKE WITH APPLE SUGAR COOKIES
Three layers of tender apple cider spice cake finished with smooth vanilla buttercream and miniature apple sugar cookies decorated with royal icing.
Ingredients
Instructions
- Pour the apple cider into a wide, heavy-bottomed saucepan. Bring to a boil over medium-high heat.
- Reduce the heat and maintain a steady simmer for 45–75 minutes, or until the cider has reduced to approximately 1/2 cup.
- Stir frequently as the cider becomes more concentrated, particularly toward the end of cooking, to prevent scorching.
- Remove from the heat and allow the reduction to cool completely.
- Preheat the oven to 350°F. If using a dark metal springform pan, reduce the oven temperature to 325°F.
- Lightly grease a 10 1/2-inch round springform pan with baking spray. Line the bottom with parchment paper and lightly grease the parchment.
- Because the cake will be baked in three separate layers using one pan, divide the cake ingredients into three equal portions. Prepare each batch immediately before baking so the batter does not sit while the other layers are in the oven.
- For the first layer, add 1/2 cup of softened butter and 1 cup of granulated sugar to the bowl of a stand mixer fitted with the paddle attachment. Beat on medium speed for 3–4 minutes, until pale and fluffy.
- Add 2 eggs, one at a time, mixing after each addition. Add 1 teaspoon of vanilla extract and mix until incorporated.
- In a separate bowl, whisk together 1 1/2 cups of flour, 1/2 teaspoon of baking powder, 1/2 teaspoon of baking soda, 1/2 teaspoon of salt, 3/4 teaspoon of cinnamon, 1/8 teaspoon of nutmeg, and a very small pinch of cloves.
- In another bowl, combine 3/4 cup of unsweetened applesauce with 2 tablespoons of the cooled apple cider reduction.
- With the mixer on low speed, add one-third of the flour mixture to the butter mixture. Follow with half of the applesauce mixture.
- Repeat with another third of the flour mixture, the remaining applesauce mixture, and the final third of flour. Mix just until combined, scraping the sides and bottom of the bowl as necessary.
- Spread the batter evenly into the prepared springform pan, smoothing the surface with a spatula.
- Place the pan on the center rack of the preheated oven and bake for 25–35 minutes, beginning to check for doneness after 25 minutes.
- The cake is ready when a toothpick inserted into the center comes out clean or with a few moist crumbs and the center springs back lightly when touched.
- Allow the cake to cool in the pan for 15 minutes. Carefully release the springform ring and transfer the cake to a wire rack to cool completely.
- Clean and prepare the pan again. Repeat the mixing and baking process twice more with the remaining ingredients to make three cake layers.
- Once completely cool, wrap each cake layer individually and refrigerate until ready to assemble.
- Add the softened butter to the bowl of a stand mixer fitted with the paddle attachment.
- Beat on medium speed for 4–5 minutes, until the butter becomes pale, smooth, and creamy.
- Reduce the mixer speed to low and gradually add the sifted confectioners' sugar, approximately 1 cup at a time. Scrape the bowl between additions.
- Add the vanilla extract, salt, and 3 tablespoons of milk or heavy cream.
- Increase the speed to medium and beat for 2–3 minutes, until the frosting is smooth and fluffy.
- If necessary, add the remaining milk or cream, a small amount at a time. The frosting should spread smoothly while remaining firm enough to hold its shape.
- Reserve approximately 1/2 cup of plain buttercream in a separate airtight container for attaching the sugar cookies.
- Add a very small amount of green gel food coloring to the remaining buttercream. Mix thoroughly until the color is evenly distributed. For a softer sage-green shade, add a tiny amount of yellow food coloring if necessary.
- Reduce the mixer to its lowest speed and mix for another 2–3 minutes to remove excess air bubbles and create a smoother finish.
- Cover the buttercream until ready to use. If preparing in advance, refrigerate in an airtight container and allow it to soften before mixing briefly and frosting the cake.
- In a medium mixing bowl, whisk together the flour, baking powder, and salt.
- In a stand mixer fitted with the paddle attachment, beat the softened butter until smooth.
- Add the granulated sugar and beat for 2–3 minutes, until light and evenly combined.
- Add the egg and vanilla extract, mixing until fully incorporated.
- Reduce the mixer speed to low and gradually add the dry ingredients. Mix only until a soft dough forms.
- Divide the dough into two equal portions.
- Place one portion of dough between two sheets of parchment paper.
- Roll the dough evenly to approximately 3/16 inch thick. Repeat with the remaining dough.
- Transfer both sheets of rolled dough to baking sheets and refrigerate for at least 1 hour.
- Once chilled, remove one sheet of dough from the refrigerator and cut out apple shapes using a cookie cutter approximately 1 1/2 inches wide.
- Transfer the cut cookies to parchment-lined baking sheets, leaving approximately 1 inch between each cookie.
- Gather the dough scraps, reroll between parchment, and refrigerate before cutting additional cookies.
- Refrigerate the cut cookies for another 10–15 minutes before baking to help preserve their shape.
- Preheat the oven to 350°F.
- Bake the chilled cookies for 8–11 minutes, checking after 8 minutes.
- Remove the cookies when their edges appear set and are just beginning to turn lightly golden.
- Allow the cookies to cool on the baking sheet for 5 minutes before transferring them to a wire rack.
- Cool completely before decorating with royal icing.
- Add the pasteurized egg white to a clean mixing bowl. Beat on medium speed for approximately 1 minute, until frothy.
- Reduce the mixer speed to low and gradually add the confectioners' sugar.
- Increase the speed and beat until the icing becomes smooth, glossy, and thick enough to hold soft peaks.
- Add the vanilla extract and mix until incorporated.
- Divide the icing into three portions, reserving approximately 80 percent for the red apples, 10 percent for the green leaves, and 10 percent for the brown stems.
- Add the appropriate gel food coloring to each portion, mixing until evenly colored.
- Divide the red icing into two portions. Keep one portion relatively thick for outlining the cookies.
- To prepare the flooding icing, gradually add a few drops of water to the second portion of red icing. Stir until a line drawn through the surface disappears within approximately 15–20 seconds.
- Keep the green and brown icing thick enough to hold small decorative details.
- Transfer the prepared icings to separate piping bags fitted with small round tips, or use piping bags with very small openings cut into their ends.
- Arrange the completely cooled sugar cookies on a flat work surface.
- Using the thicker red icing, pipe a thin outline around the outer edge of each apple.
- Fill the center of each apple with the thinner red flooding icing.
- Use a toothpick to guide the icing into any small spaces and gently pop visible air bubbles.
- Allow the red icing to firm up for several hours before adding the decorative details.
- Using the brown icing, pipe a small stem at the top of each apple.
- Add a small green leaf beside each stem using the green icing.
- Leave the decorated cookies uncovered on a flat tray, protected from dust, at room temperature for approximately 24 hours, or until the royal icing has completely hardened.
- Once fully dry, transfer the cookies to an airtight container, placing parchment between layers if stacking.
- Remove the chilled cake layers from the refrigerator and carefully unwrap them.
- If necessary, use a long serrated knife to level any domed tops so the layers will stack evenly.
- Place a small amount of buttercream in the center of a sturdy 12-inch cake board.
- Position the first cake layer on the board.
- If using the apple cider soak, lightly brush approximately 1–2 tablespoons over the surface of the cake.
- Spread approximately 3/4 cup of green buttercream evenly over the first layer.
- Position the second cake layer directly on top and repeat with the apple cider soak and another 3/4 cup of buttercream.
- Add the third layer, positioning its flattest side upward.
- Check that the cake is level and that the layers are aligned.
- Using an offset spatula, spread a thin layer of green buttercream across the entire cake, covering the top and sides.
- Refrigerate the cake for 20–30 minutes, or until the crumb coat has firmed.
- Remove the cake from the refrigerator and spread a generous layer of buttercream across the top.
- Apply additional buttercream around the sides, filling any gaps between the layers.
- Hold a bench scraper vertically against the side of the cake and slowly rotate the cake to create a smooth, even finish.
- Fill any remaining gaps with additional buttercream and smooth again.
- Use an offset spatula to smooth the top, gently drawing excess frosting inward from the outer edge.
- Refrigerate the cake until the buttercream has firmed and the cake is ready for its final decorations.
- Remove the chilled, frosted cake from the refrigerator.
- Arrange approximately 16 decorated apple sugar cookies around the outside of the cake to determine their spacing before attaching them.
- Apply a small amount of the reserved firm vanilla buttercream to the back center of one cookie.
- Gently press the cookie against the side of the cake, holding it in place for several seconds.
- Repeat with the remaining cookies, keeping their height and spacing consistent.
- If desired, attach one or two additional apple cookies near the top edge of the cake, leaving the center open for a birthday message or candles.
- Return the decorated cake to the refrigerator for 20–30 minutes to allow the buttercream attachments to firm before transporting or serving.
Notes
Baking In Batches: This recipe is designed for one 10 1/2-inch springform pan. Prepare the batter separately for each of the three layers rather than mixing all the batter at once. This prevents the baking powder and baking soda from losing effectiveness while waiting for the earlier layers to bake.
Apple Cider Reduction: Reducing the cider intensifies its apple flavor without adding excess liquid to the cake. Cool the reduction completely before adding it to the batter.
Cake Texture: The applesauce contributes moisture and tenderness, while the butter provides structure. Avoid overmixing once the dry ingredients have been incorporated.
Buttercream Consistency: The buttercream should be firm but spreadable. Add liquid sparingly, particularly when preparing frosting that will support decorations attached to the sides of the cake.
Cookie Thickness: Rolling the sugar cookies to 3/16 inch helps keep them light enough to attach to the cake while maintaining enough structure to handle.
Royal Icing Safety: Use pasteurized egg whites because the icing is not cooked. Alternatively, use a royal icing recipe formulated with meringue powder.
Drying The Cookies: Allow the royal icing to dry thoroughly at room temperature before storing or attaching the cookies. Do not refrigerate decorated cookies separately, as condensation can soften the icing or cause colors to bleed.
Attaching The Cookies: Test one cookie against the side of the cake before attaching the full set. If the cookie slips, allow the buttercream to firm further or add a small piped buttercream border beneath the cookies for additional support.
Make-Ahead Preparation: The cider reduction, cake layers, and sugar cookies can be prepared ahead of time. Decorate the cookies at least one day before assembling the cake to allow the royal icing to dry completely.
Storage: Store the frosted cake in the refrigerator, covered without touching the buttercream. Attach the fully dried cookies as close to serving as practical for the best appearance and texture. Let the cake stand at room temperature briefly before serving so the buttercream softens slightly. Refrigerate leftovers in an airtight container.
Serving: Use a sharp knife to slice the cake, wiping the blade between cuts for clean layers. Remove the decorative cookies before slicing if necessary.
